Wednesday, December 8, 2021

Virus Shawl Written Pattern

Virus Shawl
Tweaked, transcribed, and converted from UK to US terms from Bella Coco's video "How to Crochet the Virus Shawl"

MATERIALS

  • Variegated, self-striping or "roving" yarn
  • Crochet hook recommended for yarn
  • Split ring stitch marker, for keeping track of center of piece, optional
  • Tapestry needle

GETTING PATTERN STARTED

ROW 1:  Slip knot. Ch 10. Sl st in first st to make a circle. Ch 3 (counts as first dc), dc 19 in circle (20 sts).

ROW 2:  Bunch stitches up so that piece is semicircular. Ch 3 (counts as first dc). Turn. Dc in each st along, taking care not to miss top st of first ch3 (20 sts).

ROW 3:  Ch 3 (counts as first dc). Turn. [Ch 1, dc in next st] along row, taking care not to miss top st of first ch3 (39 sts).

Virus Shawl in progress

ROW 4, FIRST ROW OF PATTERN:  

•  Add quarter-circle fan:  Ch 10 (first 3 ch count as first dc). Turn. Skip first ch1 space. Sc in second ch1 space. [Ch 4. Skip next ch1 space. Sc in next ch1 space.] 3x 

•  Center of piece, semi-circle fan:  Ch 7. Skip next ch1 space. Sc in next ch1 space. Place marker, if using. Ch 7. Skip next ch1 space. Sc in next ch1 space. [Ch 4. Skip next ch1 space. Sc in next ch1 space.] 3x 

•  Add quarter-circle fan:  Ch 7. Skip next ch1 space. Dc in top of first ch3 (equivalent to ch10 on other end).

ROW 5, SECOND ROW OF PATTERN:

•  Ch 3 (counts as first dc). Turn. 9 dc in circle (10 sts). Sc in next ch4 space. [Ch 4. Sc in next ch4 space.] 2x

•  Center of piece:  10 dc in next ch7 space. 10 dc in next ch7 space. Sc in next ch4 space. [Ch 4. Sc in next ch4 space.] 2x

•  10 dc in circle.

ROW 6, THIRD ROW OF PATTERN:

•  Ch 3 (counts as first dc). Turn. Dc in next 9 sts (10 sts). Sc in next ch4 space. Ch4. Sc in next ch4 space. Skip next sc. 

•  Dc in next 20 sts. Skip next sc. Sc in next ch4 space. Ch 4. Sc in next ch4 space. Skip next sc. 

•  Dc in next 10 sts, taking care not to skip top st of first ch3. 

ROW 7, FOURTH ROW (END) OF PATTERN:

•  Ch 3 (counts as first dc). Turn. [Ch 1, dc in next dc] 9x (10 sts). Skip next sc. Sc in next ch4 space. Skip next sc.

•  Center of piece:  [Dc in next dc, ch1] 19x. Dc in next dc. (20 dc with ch1 between). 

•  Sc in next ch4 space. Skip next sc. [Dc in next dc, ch1] 9x. Dc in top of first ch3.

ROW 8, RESTARTING FIRST ROW OF PATTERN SHOWING EXPANSION:

•  Add new quarter-circle fan:  Ch 10 (first 3 ch count as first dc). Turn. Skip first ch1 space. Sc in second ch1 space. [Ch 4. Skip next ch1 space. Sc in next ch1 space.] 3x 

•  Quarter-circle fan:  Ch 7. Skip over next ch1 space, next dc, next sc, next dc, and next ch1 space. Sc in next ch1 space. [Ch 4. Skip next ch1 space. Sc in next ch1 space.] 3x 

•  Center of piece, semi-circle fan:  Ch 7. Skip next ch1 space. Sc in next ch1 space. Ch 7. Skip next ch1 space. Sc in next ch1 space. [Ch 4. Skip next ch1 space. Sc in next ch1 space.] 3x 

•  Quarter-circle fan:  Ch 7. Skip next ch1 space. Skip next sc. Skip next ch1 space. Sc in next ch1 space. [Ch 4. Skip next ch1 space. Sc in next ch1 space.] 3x 

•  Add new quarter-circle fan:  Ch 7. Skip next ch1 space. Dc in top of first ch3 (equivalent to ch10 on other end).

Continue pattern as above adding a quarter-circle fan on each end, until desired size is reached, about 30 inches from top center to triangle point. In worsted weight yarn that's 10 (4-row) pattern sets. Sc across top edge. Fasten off and weave in ends.

Tuesday, April 14, 2020

Four of Diamonds Plant Hanger

Four of Diamonds Plant Hanger
This plant hanger is a great frugal way to dress up a cheap plastic planter from the dollar store. Any non-stretchy medium weight yarn from your stash will do fine.

FINISHED SIZE:  BODY laid flat is 6 to 7 inches in width x 6 to 6 1/2 inches in length, depending on hook and yarn used. Fits a plant pot about 5 inches in height, 3 inches in diameter at base, and 6 inches in diameter at rim.

MATERIALS

  • 55 to 65 yds of any #4 / medium / worsted non-stretchy yarn
  • 4.5 mm or 5.0 mm crochet hook
  • Locking stitch marker
  • Plant pot 5 inches in height, 3 inches in diameter at base, and 6 inches in diameter at rim

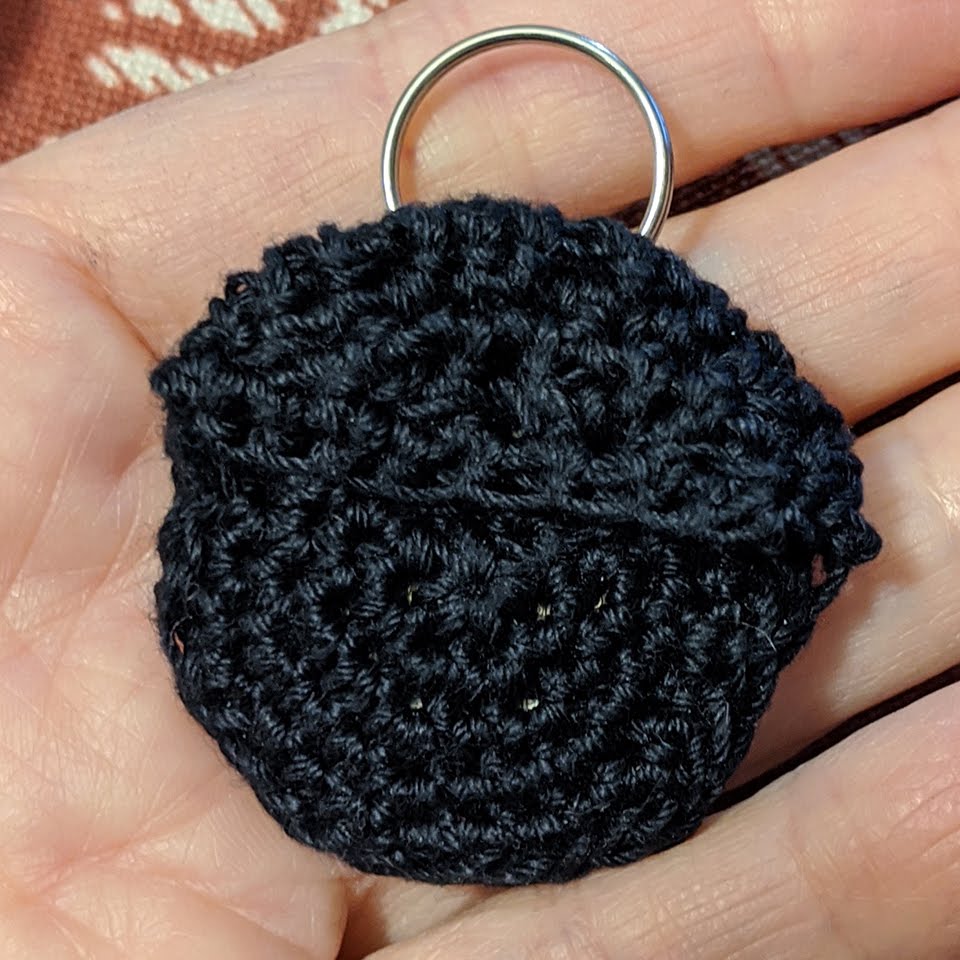
Pictured sample was made with acrylic carpet yarn and 4.5 mm crochet hook. The pot is a common $2 lightweight plastic 1-quart planter.

GAUGE:  7 dc x 4 rows = 2 inches (but not really important)

Four of Diamonds Plant Hanger, bottom
ABBREVIATIONS (US TERMS)

  • beg - beginning
  • ch(s) - chain(s)
  • dc(s) - double crochet(s)
  • dc2tog - double crochet 2 together decrease
  • ea - each
  • rnd - round
  • sc - single crochet
  • sc2tog - single crochet 2 together decrease
  • sk - skip
  • sl st - slip stitch
  • yo - yarn over

SPECIAL STITCH:  Ch-3+dc2-tog - Chain-3 and double crochet 2 together decrease - ch 2, yo, insert hook in next st and pull up a loop, pull through 2 loops on hook, yo and pull through remaining 2 loops on hook.

BODY

NOTE: Ch 3 at beg of rnd counts as st.

RND 1: Make magic circle, ch 3, dc in circle, ch 1, (2 dc, ch 1 in circle) 3x, cinch circle, sl st join to top of beg ch-3. [12 sts]

RND 2: Ch 3, dc in next dc, sk next ch, ch 5, (dc in next 2 dc, sk next ch, ch 5) 3x, sl st join to top of beg ch-3. [28 sts]

RND 3: Ch 3, dc in same dc, 2 dc in next dc, sk next 5 chs, ch 4, (2 dc in ea of next 2 dcs, sk next 5 chs, ch 4) 3x, sl st join to top of beg ch-3. [32 sts]

RND 4: Ch 3, dc in same dc, dc in next 2 dcs, 2 dc in next dc, sk next 4 chs, ch 4, (2 dc in next dc, dc in next 2 dcs, 2 dc in next dc, sk next 4 chs, ch 4) 3x, sl st join to top of beg ch-3. [40 sts]

RND 5: Ch 3, dc in same dc, dc in ea of next 4 dcs, 2 dc in next dc, sk next 4 chs, ch 2, (2 dc in next dc, dc in ea of next 4 dcs, 2 dc in next dc, sk next 4 chs, ch 2) 3x, sl st join to top of beg ch-3. [40 sts]

RND 6: Ch 3, dc in same dc, dc in ea of next 6 dcs, 2 dc in next dc, sk next 2 chs, ch 1, (2 dc in next dc, dc in ea of next 6 dcs, 2 dc in next dc, sk next 2 chs, ch 1) 3x, sl st join to top of beg ch-3. [44 sts]

RND 7: Ch 3, dc in same dc, dc in ea of next 8 dcs, 2 dc in next dc, sk next ch, (2 dc in next dc, dc in ea of next 8 dcs, 2 dc in next dc, sk next ch) 3x, sl st join to top of beg ch-3. [48 sts]

RND 8: Ch-3+dc2-tog in same st and next st, dc in next 8 sts, dc2tog in next 2 dcs, ch 2, (dc2tog in next 2 dcs, dc in ea of next 8 dcs, dc2tog in next 2 dcs, ch 2) 3x, sl st join to beg st. [48 sts]

RND 9: Ch-3+dc2-tog in same st and next st, dc in ea of next 6 dcs, dc2tog in next 2 dcs, sk next 2 chs, ch 4, (dc2tog in next 2 dcs, dc in ea of next 6 dcs, dc2tog in next 2 dcs, sk next 2 chs, ch 4) 3x, sl st join to beg st. [48 sts]

RND 10: Ch-3+dc2-tog in same st and next st, dc in ea of next 4 dcs, dc2tog in next 2 dcs, sk next 4 chs, ch 7, (dc2tog in next 2 dcs, dc in ea of next 4 dcs, dc2tog in next 2 dcs, sk next 4 chs, ch 7) 3x, sl st join to beg st. [52 sts]

RND 11: Ch-3+dc2-tog in same st and next st, dc in ea of next 2 dcs, dc2tog in next 2 dcs, sk next 7 chs, ch 10, (dc2tog in next 2 dcs, dc in ea of next 2 dcs, dc2tog in next 2 dcs, sk next 7 chs, ch 10) 3x, sl st join to beg st. [56 sts]

Continue to HANGING CORDS.

HANGING CORDS

ROW 1: Ch-3+dc2-tog in same st and next st, dc2tog in next 2 dcs, turn. [2 sts]

ROW 2: Ch-3+dc2-tog in same st and next st, turn. [1 st]
Ch 40 (about 12 inches), mark ch, ch 5, sl st in back ridge loop of marked ch (remove marker) and ea ch across, continue sl st in loop on edge of row 2, and on row 1, continue sl st in ea ch along top row of BODY, sl st into next dc.

Repeat Rows 1-2 3x.

FINISHING:  Fasten off. Weave in ends. Straighten hanging cords, gather the ch-5 loops together, and hang.

Thursday, April 2, 2020

Moss Stitch Turned Rounds Square Dishcloth

Moss Stitch Turned Rounds Square Dishcloth
Unlike a moss stitch square crocheted in-the-round, this turned-rounds design creates truly squared corners by correcting the bias that causes the swirly curvy shape. (See below the pattern instructions for how the moss stitch looks when done in-the-round.)

This method also makes a reversible cloth, not one that almost looks the same on both sides.

FINISHED SIZE:  About 7 inches square

GAUGE:  Not important. Simply do rounds until your desired size is reached.

MATERIALS
  • About 55 yards of #4 / medium / worsted cotton yarn (yarn pictured is Premier Yarns Home Cotton)
  • Crochet hook size 4.5 mm if yarn is thinner, as is the yarn I used; 5.0 mm if yarn is thicker, such as Lily Sugar 'n Cream.
  • Yarn needle

ABBREVIATIONS, SPECIAL STITCHES (US TERMS)
  • ch - chain
  • cor - corner
  • ea - each
  • hdc - half double crochet
  • ms - moss stitch - (sc, ch 1) in indicated ch sp
  • ms-cor - moss stitch corner - (sc, ch 2, sc, ch 1) in indicated corner sp
  • sc - single crochet
  • sl st - slip stitch
  • sp - space
  • st - stitch

RND 1:  Magic circle, ch 1, (sc in circle, ch 2) 4x, close circle, sl st join to first sc. [12 sts]
RND 2:  Turn, (ms-cor in next cor sp) 4x, sl st join to first sc. [5 sts/side]
RND 3:  Turn, (ms in next ch sp, ms-cor in next cor sp) around, sl st join to first sc. [7 sts/side]
RND 4:  Turn, ms in ea ch sp until next cor, ms-cor in next cor sp, (ms in ea ch sp until next cor, ms-cor in cor sp) around, ms in ea ch sp until end of rnd, sl st join to first sc. [ea rnd adds 2 sts/side]
RND 5 to 13:  Repeat rnd 4 until piece measures 6 1/2 inches across.
RND 14:  Rep rnd 4, or continue to BORDER.
BORDER (optional):  Turn, ch 1, (hdc in next ch sp, sc in next sc) to cor, 3 hdc in cor sp,
(sc in next sc, hdc in next ch sp), sc in next sc, 3 hdc in cor sp) 3x, (sc in next sc, hdc in next ch sp) until join, sl st join to first hdc, fasten off, weave in ends.

The moss stitch square worked in-the-round.
Now, here's my first attempt at a moss stitch in-the-round dishcloth. I liked the stitch but I did NOT like the swirly curvy shape at all.

Saturday, January 11, 2020

Standup Remote Caddy

Standup Remote Caddy
This sturdy 7-pocket caddy stands upright on your coffee table and holds all your remotes, sonic screwdriver, and of course crochet hooks. It's a frugal, customizable, unisex thing that would be a great gift especially for a man.

MATERIALS
  • Wide-mouth glass jar 2.75 to 3 inches diameter and 6 inches high (a heavy 24-28 ounce food jar).
  • 325-350 yds of any medium weight strong, non-stretch yarn (cotton, string/twine). I used acrylic carpet yarn.
  • 4.5 mm crochet hook (for a tight, dense crocheted fabric, use a hook at least 1/2 size smaller than recommended for yarn)
  • 7 stitch markers
  • Yarn needle

Standup Remote Caddy, loaded, top-down view
ABBREVIATIONS
  • beg - beginning
  • bl - back loop
  • ch - chain
  • fl - front loop
  • inc - 2sc in same st (increase)
  • irj - invisible round join, for instructions see https://youtu.be/lRfha_R_PZY
  • mm - move marker
  • pm - place marker
  • sc - single crochet
  • WS - wrong side
  • RS - right side

FINISHED SIZE:  6.5 inches tall x 7 inches wide

GAUGE:  13 sc and 18 rows = 4 inches.

PATTERN NOTES
  • Gauge is not important since pattern is customizable to fit any size jar. 
  • Ch 1 at beg of rnds does not count as a st.
  • Pattern is written in US terms.

Suitable wide-mouth heavy glass jar
INNER BASE

Make as many rnds as will create a disc about 1/4 inch smaller across than jar's inside diameter. My size jar's inside diameter is 2.75 inches, so I made my inner base 2.5 inches across.

Rnd 1:  Slip knot, ch2, 6sc in 2nd loop from hook, irj to beg st. [6 sts]
Rnd 2:  Ch 1 (does not count as a st), inc in same st as join and ea st around, irj to beg st. [12 sts]
Rnd 3:  Ch 1, sc in same st as join, inc in next st, pm, (sc in next st, inc in next st, pm) around, irj to beg st. [18 sts]
Rnd 4:  Ch 1, sc in same st as join, sc in ea st until marked st, inc in marked st, mm, (sc in ea st until marked st, inc in marked st, mm) around, irj to beg st. [24 sts]
Rnd 5:  Rep rnd 4 ending with fl-irj to beg st. [30 sts]

INNER SIDES

Make as many rnds as is a good fit from rim down to inner bottom of jar.

Rnd 6:  Remove markers, ch 1, fl-sc in same st as join and ea st around, irj to beg st. [30 sts]
Rnd 7-31:  Ch 1, sc in same st as join and ea st around, irj to beg st (use bl-irj on last rnd). [30 sts]

RIM FOLD

Rnd 32:  Ch 1, bl-sc in same st as join, bl-sc in next 3 sts, bl-inc in next st, (bl-sc in next 4 sts, bl-inc in next st) around, bl-irj to beg st. [36 sts]
Rnd 33:  Ch 1, bl-sc in same st as join and ea st around, irj to beg st. [36 sts]

OUTER SIDES

Make as many rounds as will fully cover outside of jar.

Rnd 34-57:  Ch 1, sc in same st as join and ea st around, irj to beg st (use fl-irj on last rnd). [36 sts]

OUTER BASE

Make as many rnds as will create a pocket space 1/2 to 3/4 inch larger in girth than your thickest remote. My thickest remote is 1 1/4 inch, so I made my pocket space about 2 inches.

Standup Remote Caddy, underside
Rnd 58:  Ch 1, fl-sc in same st as join, fl-sc in next 4 sts, fl-inc in next st, pm, (fl-sc in next 5 sts, fl-inc in next st, pm) around, irj to beg st. [42 sts]
Rnd 59:  Ch 1, sc in same st as join, sc in ea st until marked st, inc in marked st, mm, (sc in ea st until marked st, inc in marked st, mm) around, irj to beg st. [48 sts]
Rnd 60:  Rep rnd 59. [54 sts]
Rnd 61:  Rep rnd 59. [60 sts]
Rnd 62:  Rep rnd 59. [66 sts]
Rnd 63:  Rep rnd 59. [72 sts]
Rnd 64:  Rep rnd 59 ending with fl-irj to beg st. Do not remove markers. [78 sts]

Standup Remote Caddy, empty
POCKET

Rnd 65:  Ch 1, fl-sc in same st as join and ea st around, irj to beg st. [78 sts]

By continuing in-the-round, you will be working on the WS (showing back of fabric), which looks nearly the same to me as the RS. If you prefer, turn project and you will be working on the RS. Make as many rnds as will create pockets deep enough to hold remotes upright. Mine is about 1 inch less than height of outer sides.

Rnd 66:  Ch 1, sc in same st as join and ea st around, irj to beg st. [78 sts]
Rnd 67-87:  Rep rnd 66. [78 sts]
Rnd 88:  If you're still working on WS, turn before starting final row. Rep rnd 66. [78 sts]

Standup Remote Caddy, empty, top-down view
POCKET DIVIDERS

Follow column of sts from first st marker up to final rnd, pm. Push loop between sts on final rnd from outside to inside of pocket. If loop doesn't align with marked column, sl st to marker.

Row 1:  Working on inside of pocket, in a loop on back of st, ch 1, sc in same st and in next st on ea row of marked column, leaving last row unworked, turn. [21 sts]
Row 2:  Ch 1, sc in same st and ea st across. [21 sts]
Row 3-8:  Rep row 2. Fasten off leaving a long tail for sewing. [21 sts]

For ea of 6 remaining dividers, follow column of sts from next st marker up to final rnd, slip knot, and attach yarn. Rep row 1-8.

Thread divider tails onto yarn needle, and seam each divider to outer sides along its column of sts from top to bottom. Weave in ends.

TAGS:  3-dimensional, cozy, freestanding, electronics, gift, in-the-round, seamed, tabletop, written-pattern, unisex

Wednesday, December 4, 2019

Minimalist Guitar Pick Keychain Pouch

There’s no button, snap, or any clasp to catch on things in your pocket or purse, or add weight. The simple flap works perfectly. A minimalist, utilitarian, and unisex design.

FINISHED SIZE:  2 3/4 x 2 3/4 inches. Opening for pick slot is about 3/4 inch wide; crocheted fabric will stretch to accommodate width of pick. Gauge is unimportant.

MATERIALS
  • #10 cotton crochet thread, 10 or 15 yards
  • Crochet hook size 2.25 mm
  • Stitch markers
  • Large-eye sewing needle
  • Small key ring

ABBREVIATIONS
  • ch - chain
  • dec - single crochet 2 together (decrease)
  • ea - each
  • inc - 2 single crochet in same stitch (increase)
  • MC - magic circle
  • PM - place marker
  • rep - repeat
  • sc - single crochet
  • sl st - slip stitch
  • st(s) - stitch(es)

Pattern is written in US terms.

BACK

ROW 1:  Make MC, 2 sc in MC, PM in circle, draw MC loosely closed. [2]
ROW 2:  Ch 1, turn, inc in same st, inc in last st. [4]
ROW 3:  Ch 1, turn, sc in same st and in ea st across. [4]
ROW 4:  Ch 1, turn, inc in same st, sc in next 2 sts, inc in last st. [6]
ROW 5:  Ch 1, turn, sc in same st and in ea st across. [6]
ROW 6:  Ch 1, turn, inc in same st, sc in next 4 sts, inc in last st. [8]
ROW 7:  Ch 1, turn, sc in same st and in ea st across. [8]
ROW 8:  Ch 1, turn, inc in same st, sc in next 6 sts, inc in last st. [10]
ROW 9:  Ch 1, turn, sc in same st and in ea st across. [10]
ROW 10:  Rep row 9, PM in first and last sts of row. [10]
ROW 11:  Ch 1, turn, dec in same and next st, sc in next 6 sts, dec in next and last st. [8]
ROW 12:  Ch 1, turn, dec in same and next st, sc in next 4 sts, dec in next and last st. Continue to FLAP. [6]

FLAP

ROW 13:  Ch 1, turn, sc in same st and in ea st across. [6]
ROW 14:  Ch 1, turn, inc in same st, sc in net 4 sts, inc in last st. [8]
ROW 15:  Ch 1, turn, inc in same st, sc in next 6 sts inc in last st. [10]
ROW 16:  Ch 1, turn, sc in same st and in ea st across. [10]
ROW 17:  Rep row16, PM in first and last sts of row. [10]
ROW 18:  Ch 1, turn, dec in same and next st, sc in next 6 sts, dec in next and last st, fasten off. [8]

FRONT

ROW 1:  Attach yarn in MC, 2 sc in MC. [2]
ROW 2:  Ch 1, turn, inc in same st, inc in last st, remove marker from MC, draw MC fully closed. [4]
ROW 3-12:  Rep rows 3-12 of BACK. Fasten off.

ASSEMBLY
  1. Weave in all ends. 
  2. Flip up and align FRONT over BACK, and fold FLAP over top. Use 1 stitch marker to pin together the 3 edge stitches of marked rows (row 10 on BACK, 16 on FLAP, and 10 on FRONT) on left side of piece, then repeat on right side. It may also be helpful to pin the edge stitches on row 12 of BACK and FRONT and the corresponding stitch on FLAP.
  3. Thread a length of yarn onto sewing needle and seam edges. Weave in tails. 
  4. Slip keyring around a group of 3 or 4 stitches near top center edge of BACK (not on FLAP).
Tags:  bag, cozy, keychain, pouch, seamed, unisex, worked-flat, written-pattern


Tuesday, December 3, 2019

Minimalist Keychain Quarter Pouch

A pouch to keep a single quarter handy for trips to a supermarket, such as Aldi, where the shopping carts are chained together and a quarter is needed to rent one. There’s no button, snap, or any clasp to catch on things in your pocket or purse, or add weight. The simple flap works perfectly. A minimalist, utilitarian, and unisex design.

Minimalist Keychain Quarter Pouch
FINISHED SIZE:  About 1 1/4 inch diameter. Gauge is unimportant.

MATERIALS

  • #10 cotton crochet thread, 10 or 15 yards
  • Crochet hook size 2.25 mm
  • 6 stitch markers
  • Large-eye sewing needle
  • Small key ring

Minimalist Keychain Quarter Pouch (front)
ABBREVIATIONS

  • ch - chain
  • rep - repeat
  • rnd(s) - round(s)
  • RS - right side
  • sc - single crochet
  • sc2tog - single crochet 2 together
  • sl st - slip stitch
  • st(s) - stitch(es)

Pattern is written in US terms.

Minimalist Keychain Quarter Pouch (back)
BACK

  1. RND 1:  Make magic circle, 6 sc in circle, sl st join to first sc, close circle. [6]
  2. RND 2:  Ch 1, 2sc in same st and ea st around, sl st join to first sc. [12]
  3. RND 3:  Ch 1, sc in same st, 2sc in next st, * sc in next st, 2sc in next st, rep from * around, sl st join to first sc. [18]
  4. RND 4:  Ch 1, sc in same st, sc in next st, 2sc in next st, * sc in next 2 sts, 2sc in next st, rep from * around, sl st join to first sc. [24]
  5. RND 5:  Ch 1, sc in same st, sc in next 2 sts, 2sc in next st, * sc in next 3 sts, 2sc in next st, rep from * around, sl st join to first sc, continue to Flap. [30]

FLAP

  1. ROW 1:  Ch 1, sc in same st and in next 14 sts. [15]
  2. ROW 2:  Turn, sc2tog in same and next st, sc in next 3 sts, * sc2tog in next 2 sts, sc in next 3 sts, rep from * around. [12]
  3. ROW 3:  Turn, sc2tog in same and next st, sc in next 2 sts, * sc2tog in next 2 sts, sc in next 2 sts, rep from * around. [9]
  4. ROW 4:  Turn, sc2tog in same and next st, sc in next st, * sc2tog in next 2 sts, sc in next st, rep from * around. [6]
  5. ROW 5:  Turn, sc2tog in same and next st, (sc2tog in next 2 sts) 2x, sl st along edge of flap to side of piece. [3]
  6. ROW 6:  Turn, sc in same st and across edge of flap to other side of piece, fasten off.

FRONT

Rep Back rnds 1-5. Fasten off leaving long tail for sewing.


ASSEMBLY

  1. Weave in all ends except sewing tail. 
  2. With RS of each piece facing outward, lay front over back and fold flap over front. Match up the lower 4 hexagonal corners and pin together with stitch markers. Also pin left and right side underneath flap, leaving 3/4-inch slot for a quarter to slip into pouch. 
  3. Thread tail onto sewing needle and use sewing method of choice to join pieces from the first marker around to the last; weave in tails. 
  4. Slip keyring around a group of 3 stitches near top center edge of back (not on flap).

TAGS: bag, circle-shaped, coin, keychain, money, pouch, purse, quarter, seamed, shopping-cart

Wednesday, October 23, 2019

Wine Bottle Gift Cover

This pattern resembles a beautiful project improvised by "jdocktor" on RavelryI worked up something similar in a different yarn and kept notes along the way. It's fun to make, and I think a hand-made wine bottle cover adds a little more joy to gift giving.

Pattern is written in US terms.

SIZE:  To fit 750 ml wine bottle of typical dimensions.

MATERIALS
  • US I-9 / 5.5 mm crochet hook, or hook needed to obtain gauge
  • 47 g / 83 yds Premier Home Cotton Grande Solids & Marls (or any #4 / medium / worsted yarn) 
  • Yarn needle

GAUGE:  12 hdc x 8 rows = 4 inches, however, swatch is unnecessary; if the diameter of your completed base (RND 1-3) is about 3.5 inches you're good to go.

ABBREVIATIONS
  • ch - chain
  • dc - double crochet
  • dc2tog  - double crochet 2 together decrease
  • ea - each
  • hdc - half double crochet
  • hk - hook
  • lp(s) - loop(s)
  • rem - remaining
  • rep - repeat
  • RND - round
  • sk - skip
  • sl st - slip stitch
  • st(s) - stitch(es)
  • tr - triple crochet
  • yo - yarn over

SPECIAL INSTRUCTION "Work dc2tog across next 3 sts":   Yo, insert hk into indicated st and draw up a lp (3 lps on hk), draw through 2 lps (2 lps on hk), sk next st, yo, insert hk into next st and draw up a lp (4 lps on hk), draw through 2 lps (3 lps on hk), yo, draw through 3 rem lps on hk.

  1. RND 1:  (Base) Magic ring, ch 3 (counts as dc), 8 dc in ring, draw ring closed, sl st join to top of ch3. (9 sts)
  2. RND 2:  Ch 3 (counts as dc), 2 dc in same st, 2 dc in next st and ea st around, sl st join to top of ch3. (19 sts)
  3. RND 3:  Ch 2, hdc in same st, 2 hdc in next st and ea st around, sl st join to top of ch2. (38 sts) Diameter of base should be about 3.5 inches.
  4. RND 4:  (Form sides) Ch 2 (counts as hdc), hdc in back lp of next st and ea st around, sl st join to top of ch2. (38 sts) 
  5. RND 5:  (Foundation for wave shape) Ch 4 (counts as tr), tr in next st, * dc in next 3 sts, hdc in next 3 sts, sc in next 3 sts, hdc in next 3 sts, dc in next 3 sts *, tr in next 4 sts, rep from * to *, tr in next 2 sts, sl st join to top of ch4. (38 sts) 
  6. RND 6:  (Wave pattern) Ch 3, 5 dc in same st, sk next st, *(dc in next st, sk next st) 3x*, work dc2tog across next 3 sts, sk next st, rep from * to *, 6 dc in next st, 6 dc in next st, sk next st, rep from * to *, work dc2tog across next 3 sts, sk next st, 6 dc in next st, sl st join to top of ch3. (38 sts) 
  7. RND 7-15:  Rep round 6. Laid flat, piece should measure about 13.5 inches long and 4.5 inches wide; with a bottle inside, about 12 inches high and 10.5 inches around. 
  8. RND 16:  Ch 1, sc in same st and ea st around. (38 sts) Join using invisible finish: Cut yarn leaving about 6-inch tail, thread tail onto yarn needle. Sk next sc, insert needle bottom-up through both lps of next sc and draw yarn through. Insert needle top-down between lps of last completed sc, draw yarn through, and weave end inside of work.
  9. Make tie string:  Ch 90 or 100 (28 to 29 inches unstretched). Sl st in 2nd ch from hk and ea ch across (length will shorten to about 24 to 25 inches). Fasten off and weave in ends. Attach string around bottle neck by threading it through gaps between stitches, and tie.

TAGS:  3D bottle, bottom-up, cover, cozy, gift, in-the-round, lace, one-piece, seamless, wine, written-pattern